Help
Installing and using Payment Collect sync tool
Payment Collect Sync tool will help you integrate your Shopify store and QuickBooks Desktop POS software. Payment Collect Sync tool is a web based application designed to interact with Quickbooks Desktop POS through Web Connector, a Quickbooks propietary middleware. This application will help keep the Inventory on both systems in sync. With little additional work, you can keep in sync Shopify and QuickBooks inventory, thus enabling your business to reap the benefits of increased efficiency and reliable inventory and financial data. Payment Collect sync tool will automatically sync all your Quickbooks inventory data, and it will show up on Shopify as inventory items within a product categorization. Each item will automatically be imported into Shopify belonging to a product category and a basic collection. Inventory items from Quickbooks are imported and mapped on a one-on-one basis to the Shopify inventory items and attached inventory level.
The software solution consists of two components. One is the App that should be installed at your store on Shopify. The second component is Web Connector which is part of Quickbooks Desktop and in most cases should have already been installed while installing Quickbooks Desktop software. This guide will walk you through the installation process and advice on using the tool.
Installation
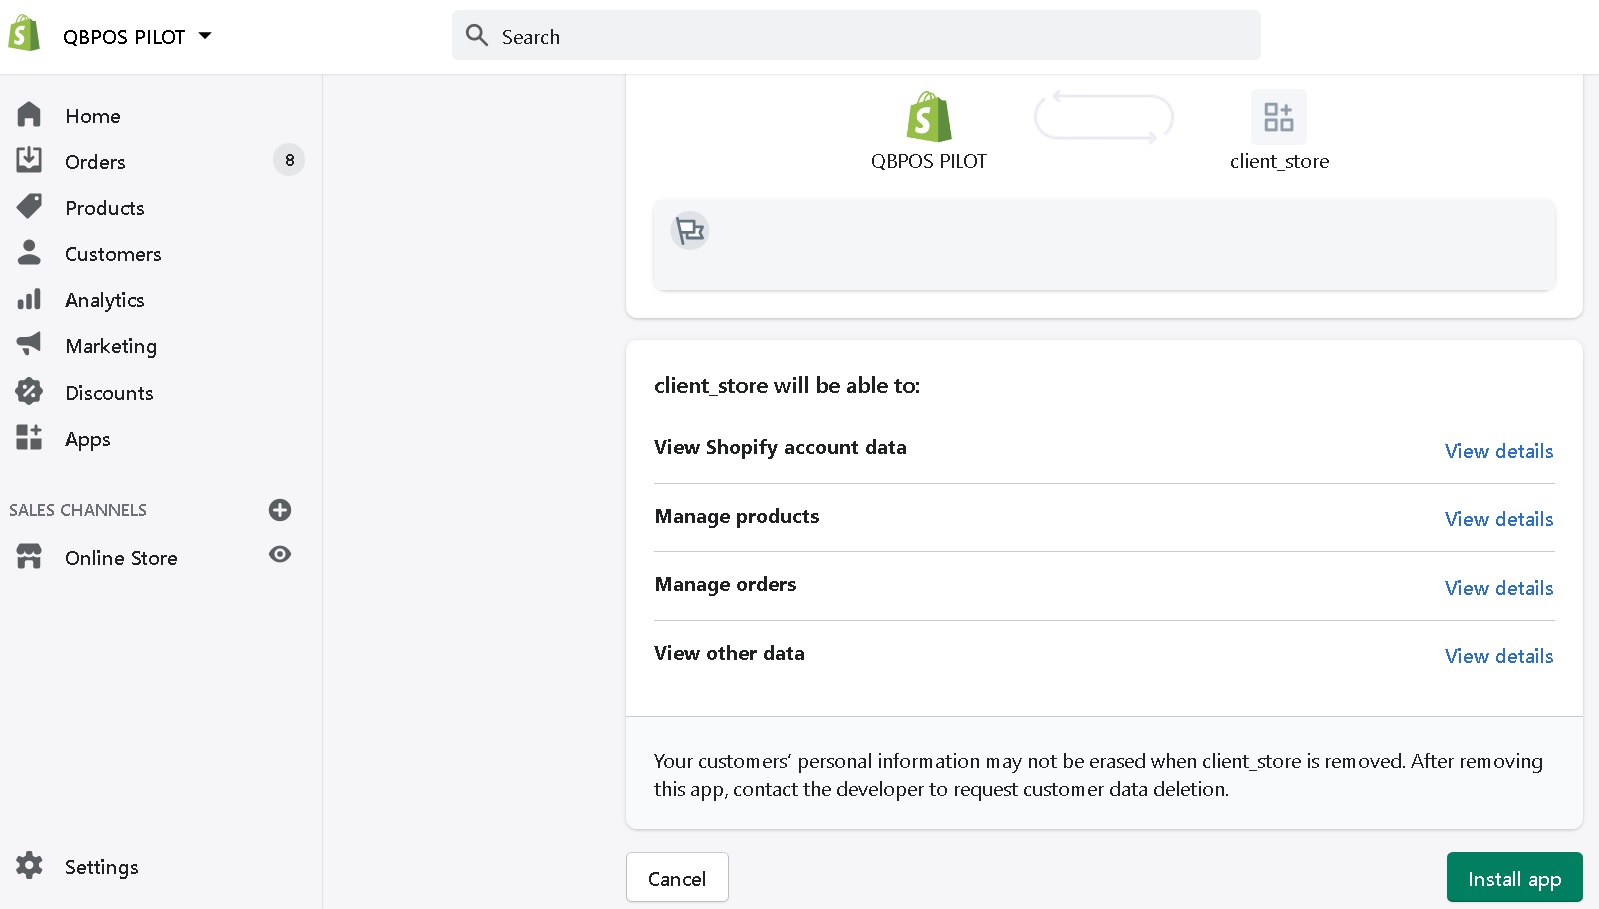
- From your store go to Apps. Visit the Shopify App Store. Find Payment Collect sync tool. Click on Add app.
- Click on install app and you will be asked to accept or decline the recurring charges. Select the payment method. Once the recurring charge is set up you will be redirected to the App website.
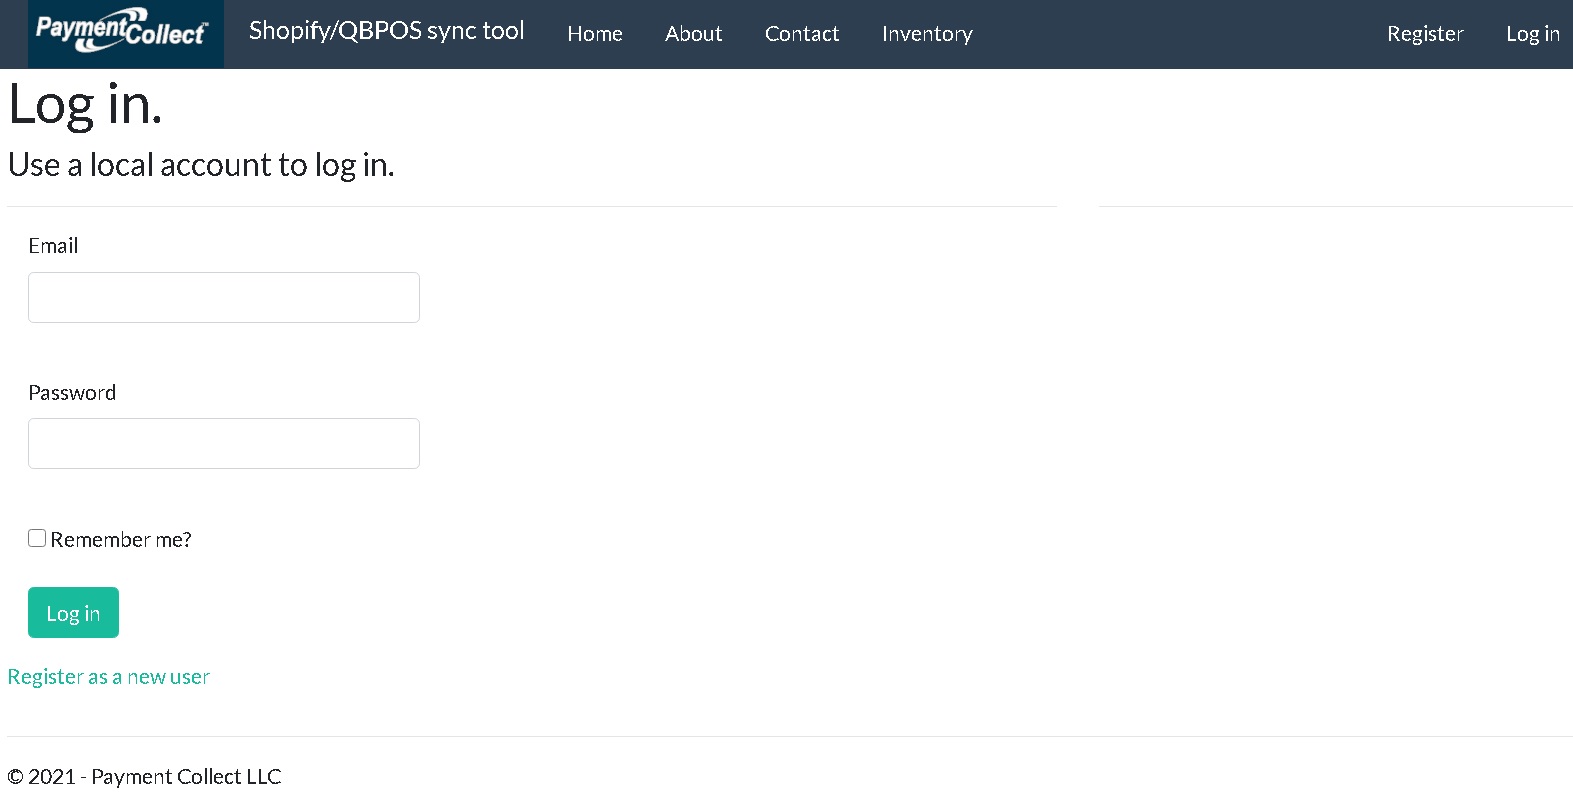
- On the App website click on Register. Register a new user. This user will be associated with your store on Shopify and will become the administrator user for the App.
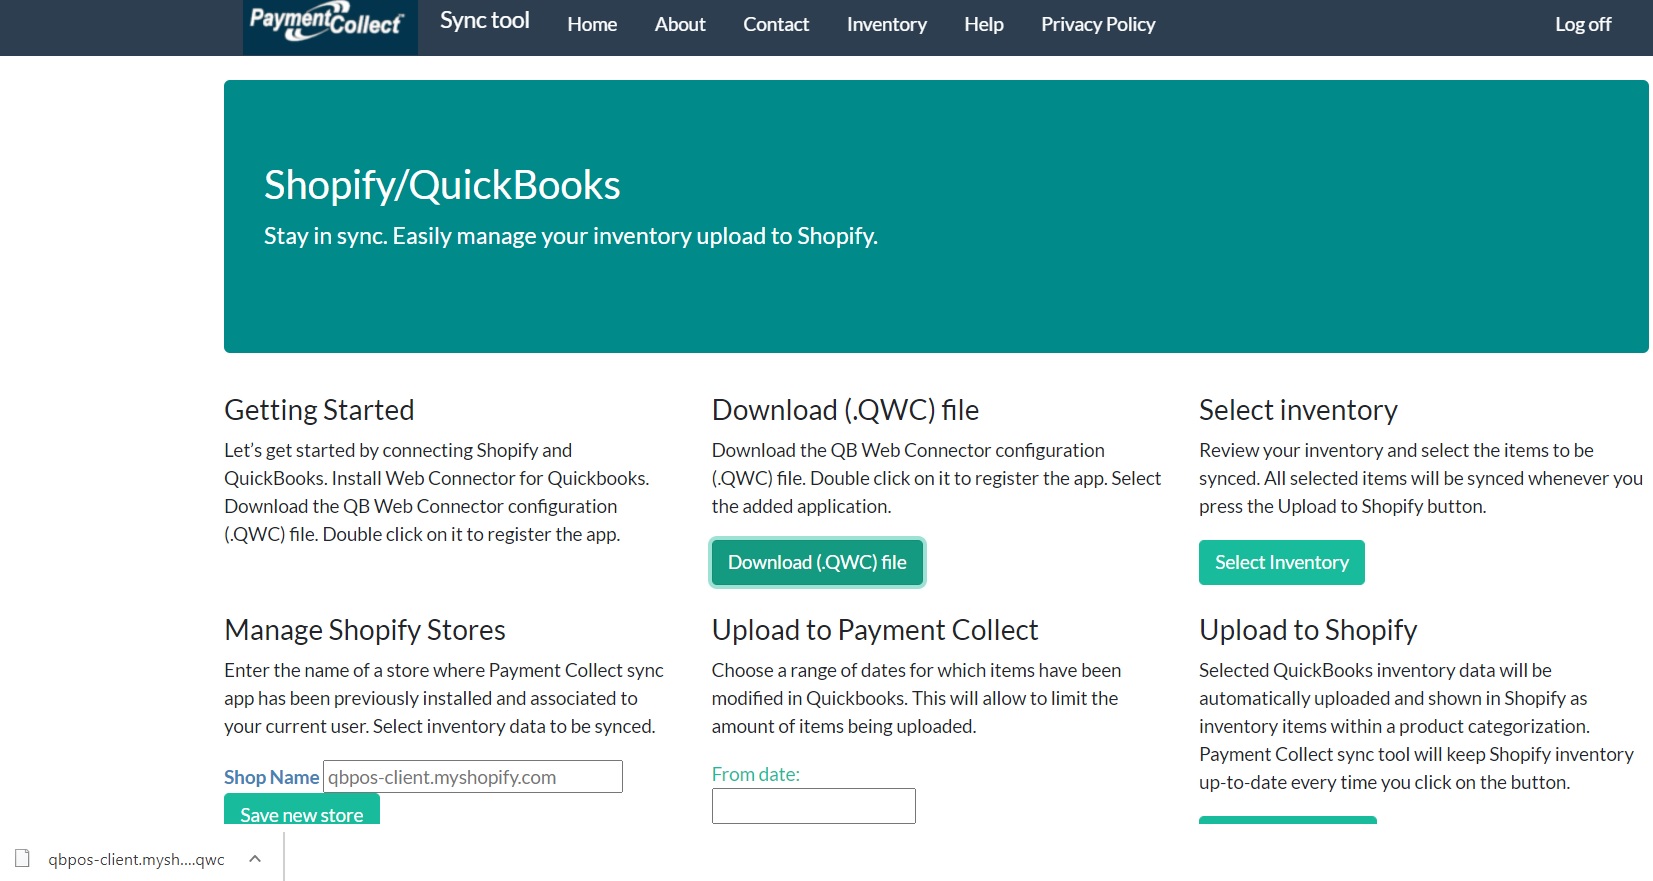
- You will be directed to the Sync Tool page. Here the name of your store should appear under Manage Shopify Stores.
- Go to Download (.QWC) file, press the button and download the Web Connector configuration file. When you double click on the file, the file extension should be recognized and Web Connector launched automatically. If your system does not find Web Connector then it should be installed.
- If you need to install Web Connector, you can download it from Intuit's site. Download the Web Connector installer. Follow the prompts to install.
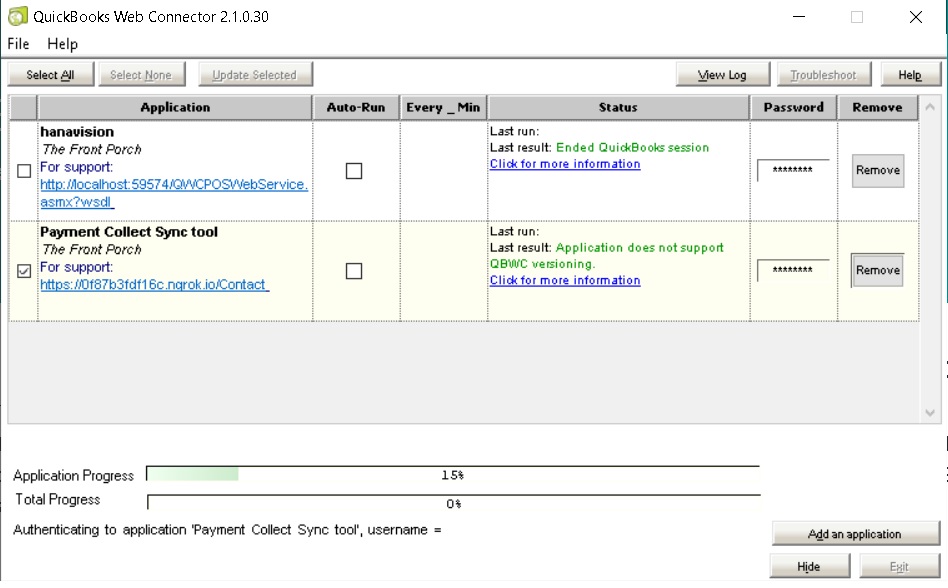
- Once the provided QWC file is open in Web Connector, you will be prompted to add the application. Click on OK. The application will be added and configured automatically. Next, a pop up window will ask you to select a QBPOS server. Select the server managing your Company file data. This should be the currently open Company file for the work station from which the inventory data will be extracted.
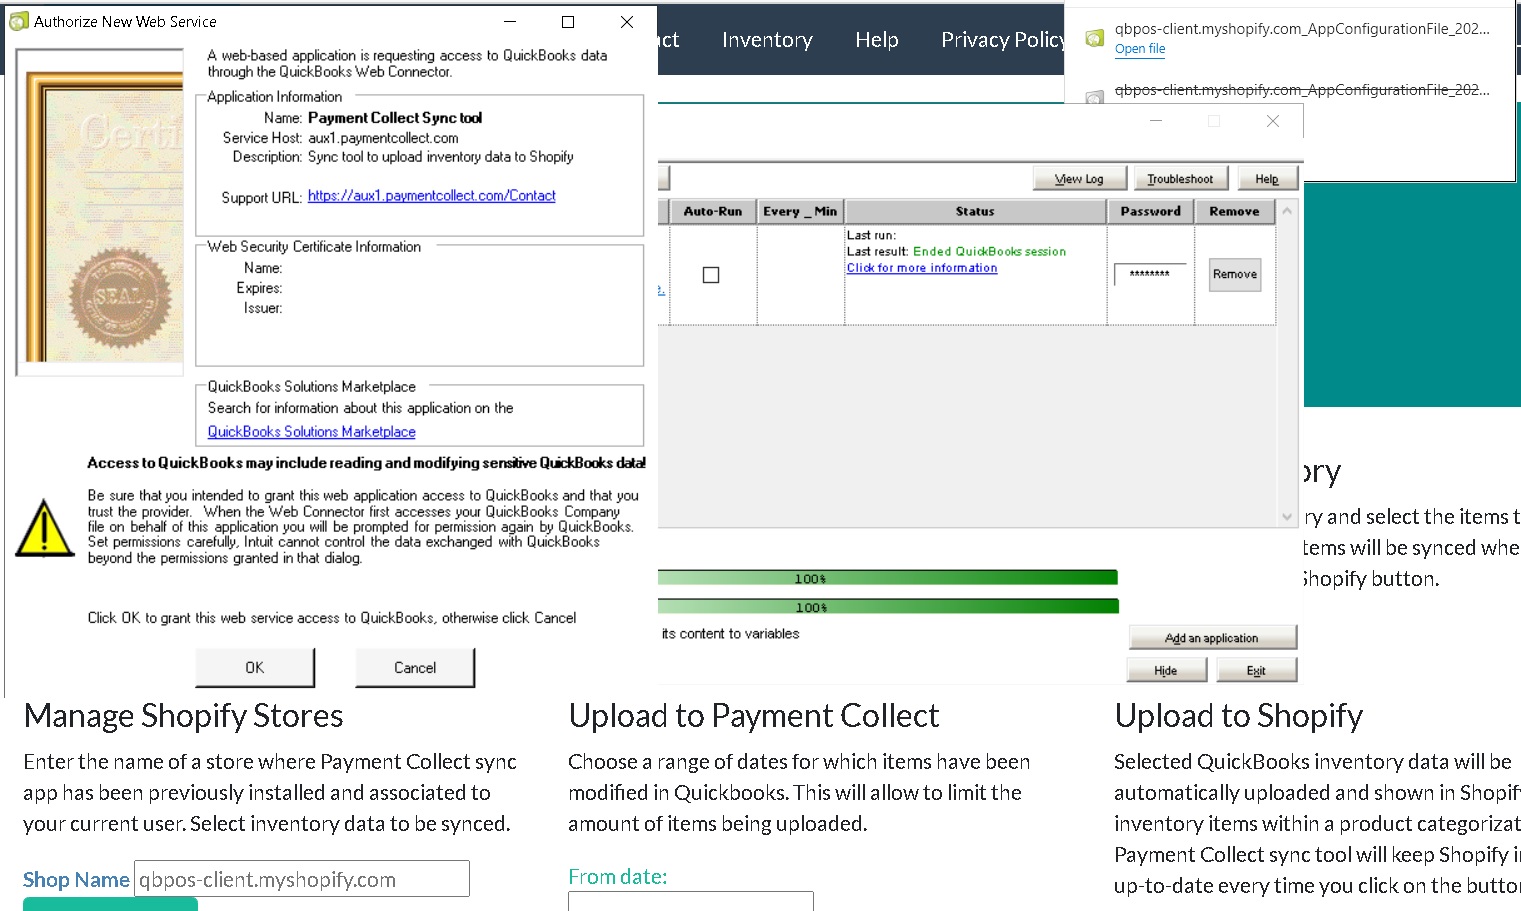
- Finally, you'll have to provide the same password you created when registering at the App website in the Password field and click on Yes when prompted to save it.

Now everything is set up and you are ready to start synchronizing data between Quickbooks and Shopify.
Using the App
You may have a lot of products that have been registered over the years in your Quickbooks systems. It is likely that many items lack inventory. It is also plausible that you may want to upload to Shopify only a fraction of all items to sell online. So, the first thing to do is to select which items will be synchronized between Quickbooks and Shopify.
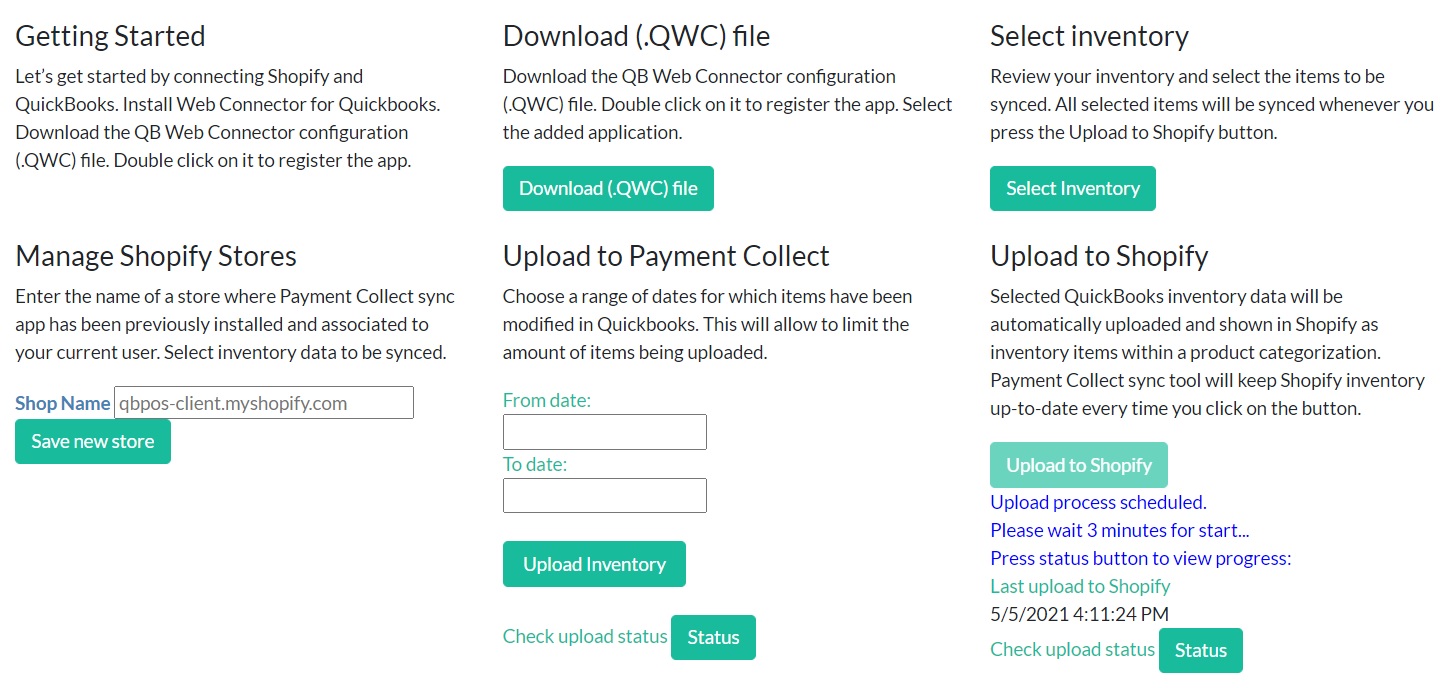
In order to make an initial selection of the items to synchronize go to Upload to Payment Collect on the App website.
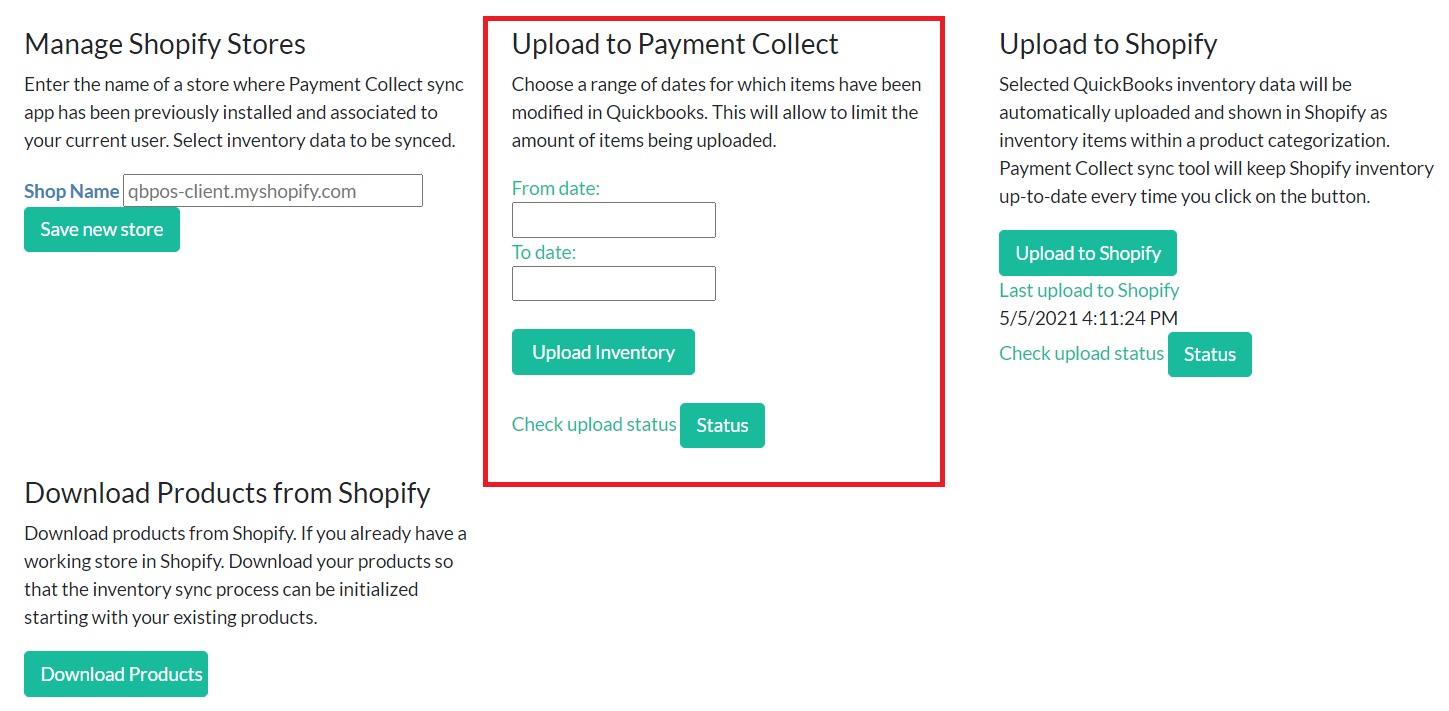
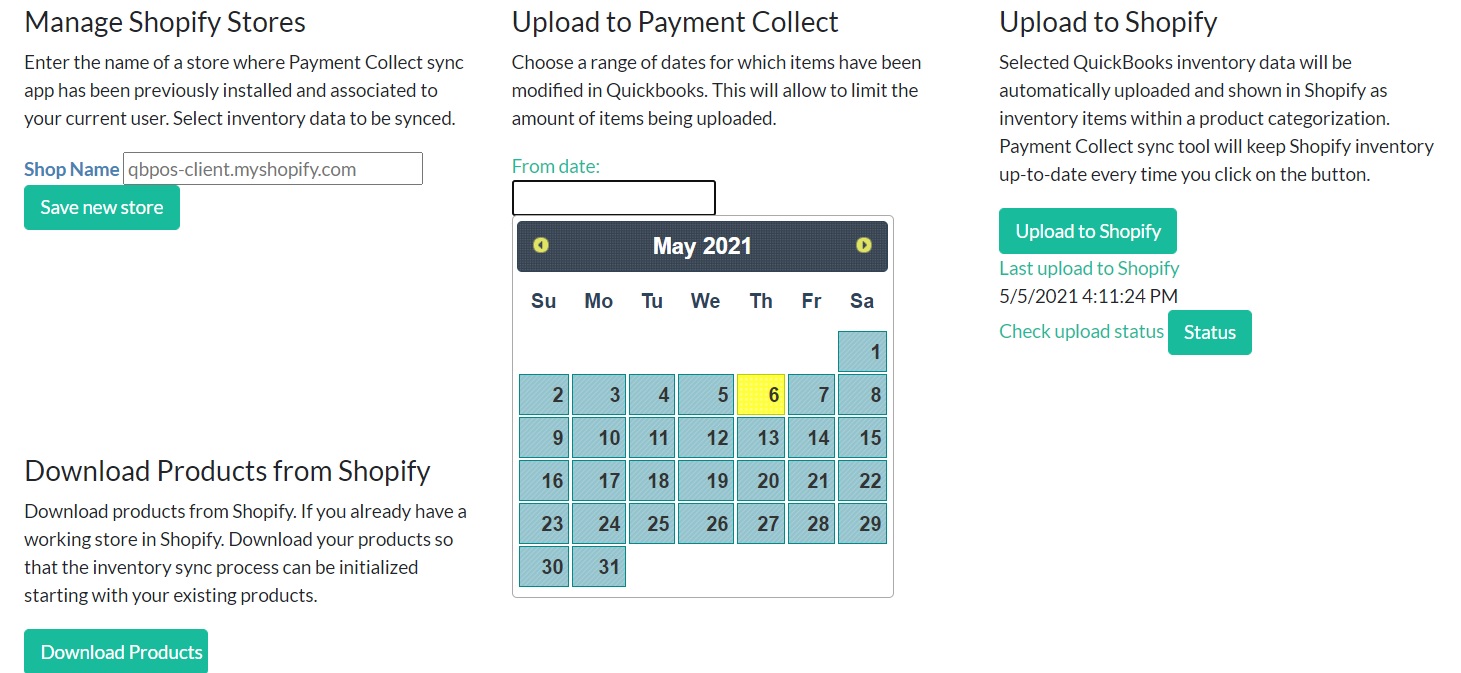
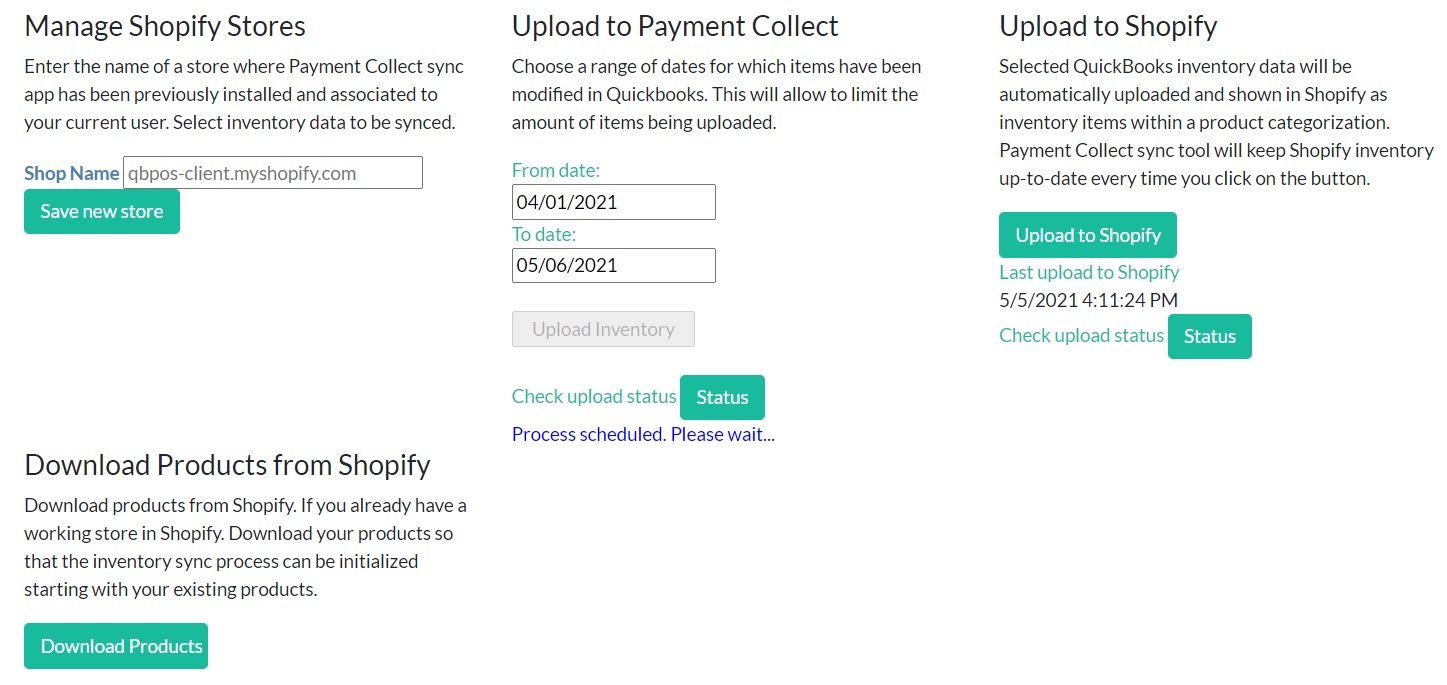
Select a range of modification dates that will encompass the period during which you have been working on the items that you want to upload to Shopify. It is likely that the items you are interested in are the ones you have been working on for the past few years. After setting the dates for the range click on Upload Inventory.
Choose the dates so that you get a subset of all items that is wide enough that it will contain all items you want to include in the synchronization. The upload process will be scheduled and will start within the next 3 minutes. After the first 3 minutes have elapsed you can check the upload process status by pressing the status button. It will show the amount of items uploaded so far and indicate when the process have concluded.
Please be aware that the very first time data is extracted from Quickbooks database, a pop up window from Web Connector will ask you again to select a QBPOS server. Select the server managing your Company file data. This time, the App will retain this information and you will not be asked again to submit it.
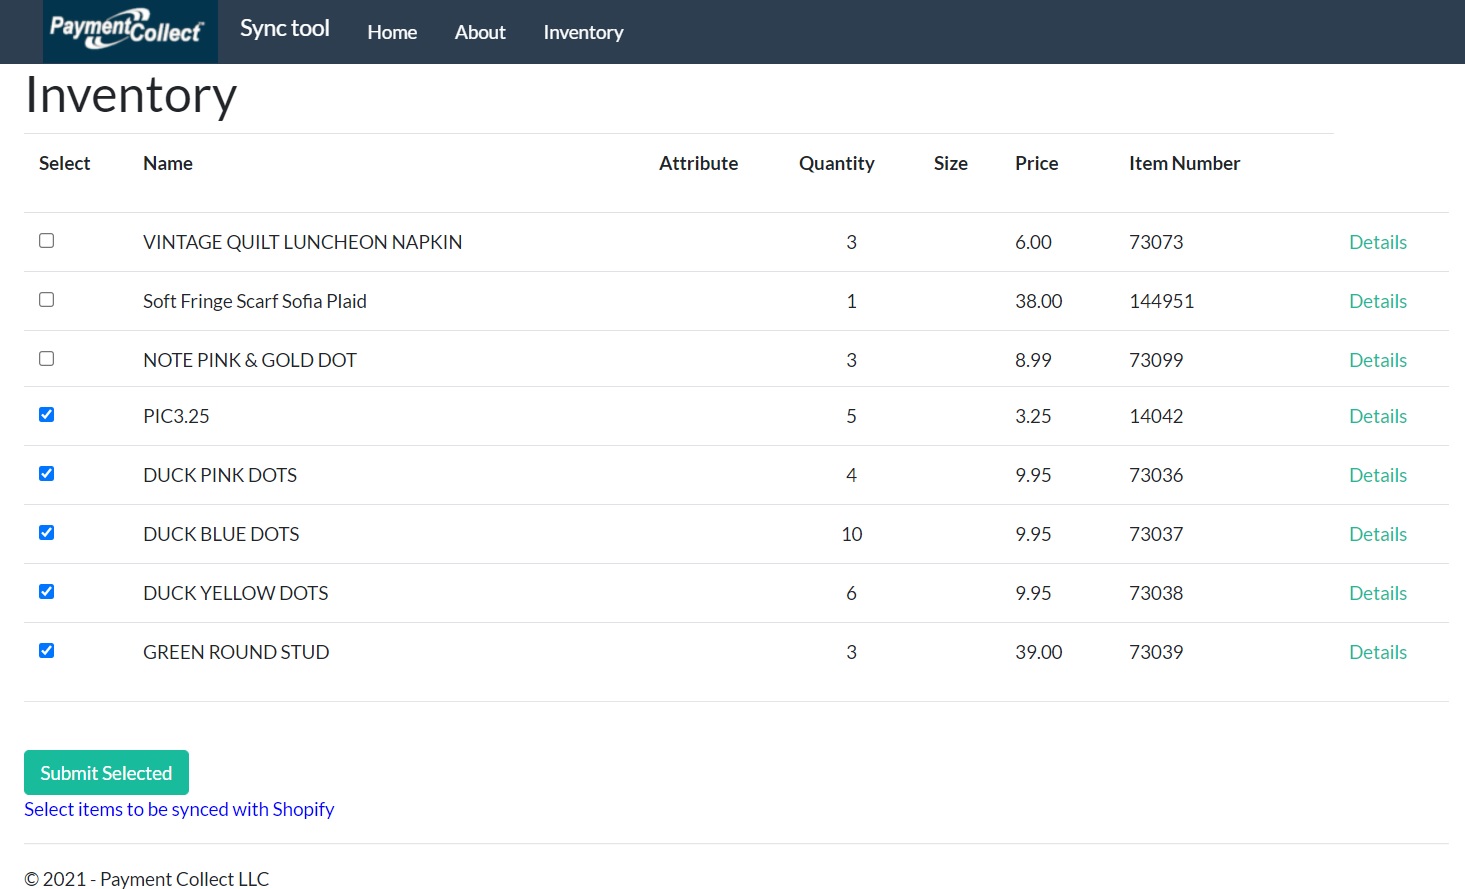
Once the process is finished, you can go to Select Inventory and review the uploaded inventory by pressing the Select Inventory button. Items will be uploaded to the Sync tool website only at this stage. From the list of items you can select those that will be further uploaded to Shopify on a regular basis.
On the boxes in the left column titled Select, click to select the items you want to synchronize with Shopify. From now on, whenever you want to add new items to the list, you should repeat the process described above to upload items to Payment Collect.
Now you are ready to start synchronizing. Go to Upload to Shopify and press the Upload to Shopify button. The process will be scheduled and it will start within the next 3 minutes. After this time you can check the upload process status by pressing the status button. It will show the amount of items uploaded so far and indicate when the process have concluded. You can also see the overall progress of the upload on the Web Connector's progress bar. Once the process has terminated a message will state that a successful synchronization is finished.
You can now check the items that have changed or have been created new in your store at Shopify.
Managing products at the store
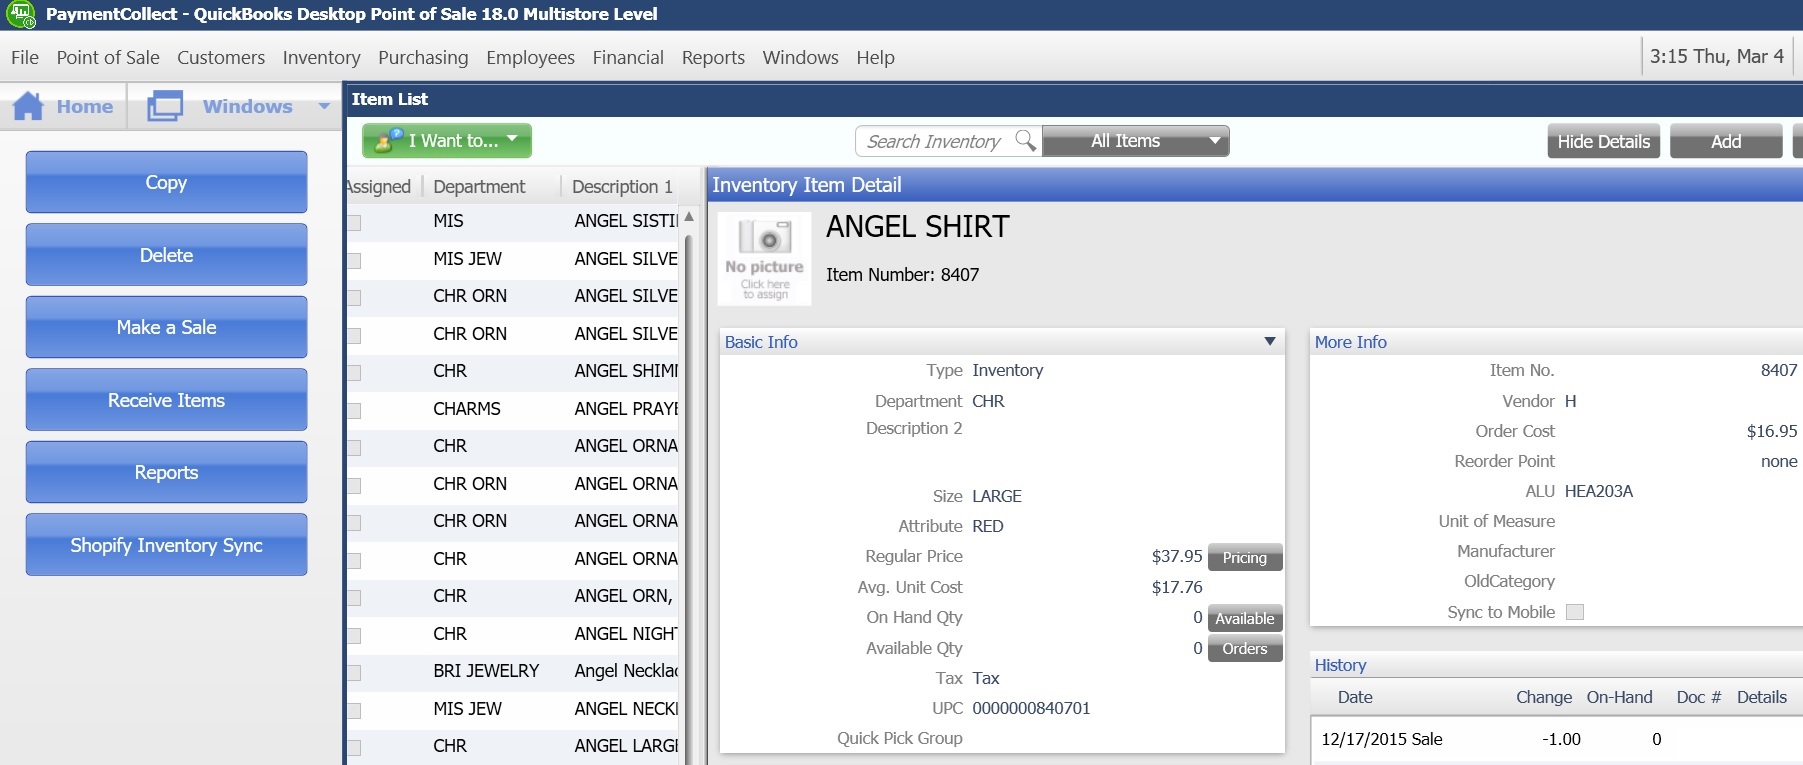
Once you have synchronized items from Quickbooks go to Inventory menu option in the administration view of your store on Shopify. Each inventory item on Shopify (bear in mind that each variant within a product is a separate inventory item) will be associated on a one-to-one basis with the corresponding inventory item in Quickbooks.
If the variant is already found on Shopify the product it belongs to will remain in the same status as before. If a new product is created then the product will be created in a draft status. You should work on newly created draft products to finalize the details of the information to be displayed to customers. Once you are satisfied with the content of the product then you will need to manually set it to active so that the product becomes available to customers on your store.
The transfer and matching of data from Quicbooks to the fields that make up a variant on Shopify is as follows:
|
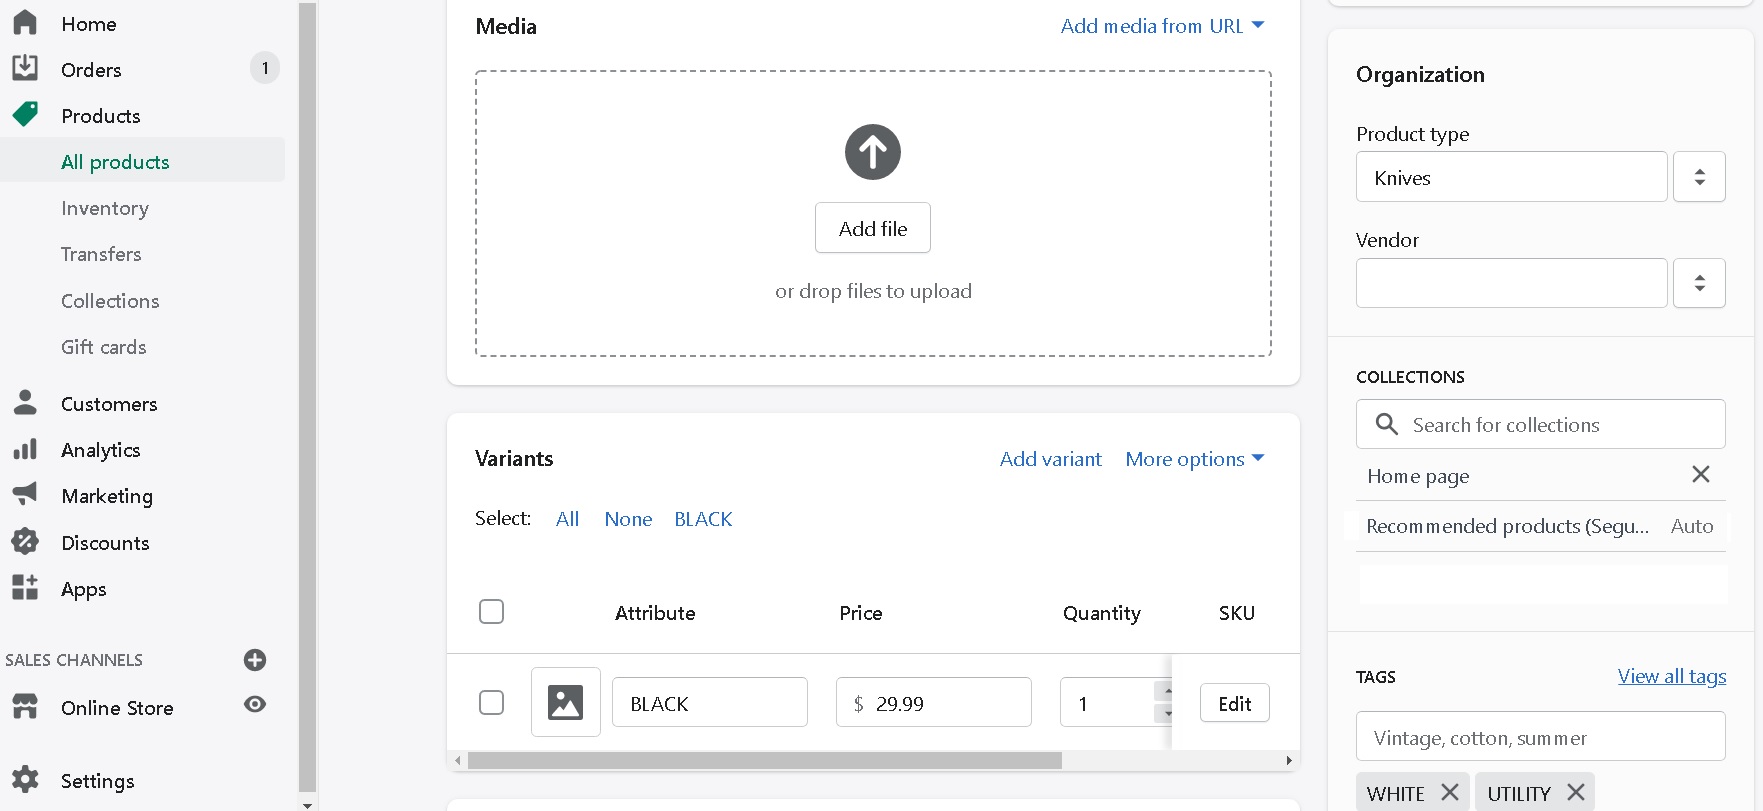
- Title of product. Matches Description 1 in Quickbooks. Items in Quickbooks that correspond to variants of the same product on Shopify must have the same name in the Description 1 field. The basic characteristic that differentiates these items is the combination of attribute and size in Quickbooks. Attribute and size will be transferred to Shopify as the basic feature for the variant within a product.
- Description. Matches Description 2 in Quickbooks. The content from Description 2 will be transferred only once at the time of creation of the variant. You can freely edit this field afterwards to enhance the description with suitable rich text features.
- Product type. Matches department for the item in Quickbooks. The product type field on Shopify will not be overwritten with every sync. Notwithstanding, the first time a product is created as draft, product type will contain data for the department store in Quickbooks. You can change this field freely afterwards. All products must have a product type on Shopify.
- Vendor. Matches the field vendor in Quickbooks. The vendor field on Shopify will not be overwritten with every sync.
- Collections. Every new product created during synchronization by default belongs to the Home Page basic collection. You can freely change collection membership for the product afterwards. This will not be changed by the app in successive uploads.
- Tags. Matches the keywords internal Quickbooks field. This field is calculated by Quickbooks by simply breaking up Description 1 into separate words. When a new Product is created on Shopify, it will contain the keywords data as a starting point. This field can subsequently be edited and it will not be replaced by the app in future uploads.
- Attribute column. Added to variant information on Shopify. Matches attribute field in Quickbooks. If anything is added to this field in Quickbooks then a column is added to the variant information with its content.
- Size column. Added to variant information on Shopify. Matches size field in Quickbooks. If anything is added to this field in Quickbooks then a column is added to the variant information with its content.
- Price. Matches the regular price for the Quickbooks item.
- Quantity. Matches quantity on hand for the Quickbooks item.
- SKU. Matches the item number for the Quickbooks item. A "_QB" suffix is added to the item number. This will indicate that the variant has been associated with the item in Quickbooks by the app.
- Barcode. Matches the UPC field in Quickbooks.
- Weight. Matches weight for the Quickbooks item.
|
In summary the information you can change without it being affected by the synchronization are the Description, the images for the product and the organization fields: product type, vendor and tags.
Once you have synchronized, you should review the newly created draft products and check the data fields for the product. You should add images to the product if necessary and edit the description of the product to produce an enticing marketing text that will advertise your products suitably.
Next you need to review the product type, vendor and tags and change then if necessary so that they meet your needs.
When you are satisfied with the content of the product then you are ready to set it to active so that it becomes available to your customers on the store.
Syncing inventory items periodically
When changes are made in Quickbooks to items selected for synchronization you should got directly to the Upload to Shopify section on the App website and press the Upload to Shopify button to bring those changes to Shopify. This can be done for example once a day, at the end of the day so that all changes made during the day are reflected on Shopify.
The synchronization process will take from a few minutes to a few hours depending upon the number of items to be synced. 500 items will take approximately 3 hours. A couple dozen items will take a few minutes.
Whenever a new item is added to Quickbooks and you want to include this item on Shopify, you should select the item in the Select Inventory section of the App website so that the item will be included in the list of items being synchronized periodically. Each time you synchronize from the App website, the selected items in the list will be uploaded from Quickbooks via Web Connector to Shopify, if modified within the time frame from the last upload date and time (indicated on the Sync tool page) to today's current time.
Installing the app on a Shopify store with already existing items
If you are using the app on a store that has already items in the inventory, an additional step has be taken before the initial synchronization can take place.
Upon completion of the installation of the app you will be redirected to the App website where you will be prompted to login or register a user. After you register your user, you will be directed to the Sync tool page. On the page, scroll down to the Download Products from Shopify section. Press the Download Products button. A process is started that will download all product information from your store to the app database. This data will be used to compare it with the data coming from Quickbooks POS via Web Connector, so that the existing product data can be matched up with the corresponding items in Quickbooks.
After downloading product data from Shopify and before you start the first synchronization from Quickbooks you need to review all the variants already on Shopify one by one. You should manually identify the corresponding item in Quickbooks for each existing variant on Shopify.
There are 3 key parameters of an item in Quickbooks that will help the app find that item (variant) on Shopify and match up the corresponding item from Quickbooks, namely: the product description (Description 1), the Attribute and the Size.
When you have found the item in Quickbooks that corresponds to the variant on Shopify make sure that Description 1 for the Quickbooks item matches the Title for the Product on Shopify. This means that all items that will eventually fall under the category of one and the same product should share an identical Title. For use within Quickbooks you can freely use Description 2 to differentiate items of the same product, but Description 1 must be the same. Attribute and Size for the Quickbooks item must match the parameters that identify the variant on Shopify. Size should be named Size on Shopify (as option title, header at the top of the column). The second parameter can have any name (option header title) other than Attribute for an existing product variant. All new variants added to a newly created product based on data from Quickbooks can have any combination of Attribute and Size and they will be featured in the same fashion on Shopify and appear in the variant data line on the product page as viewed on the admin portal for the store.
Once you have reviewed and modified if necessary all items in Quickbooks for the existing variants on Shopify, and the 3 key parameters match, then you are ready for the initial synchronization.
Go to the Upload to Payment Collect section and complete the process described above to sync Quickbooks Inventory with that of Shopify.
Once the synchronization is complete, go to Shopify and review all items in the store. Any item from Quickbooks not found on Shopify will come up as a separate product draft. Identify the mismatch and correct it in Quickbooks. Once the item is rectified, run the synchronization process again (this time going directly to the Upload to Shopify section). The item should be correctly found on Shopify and the items on both systems associated accordingly.
Once all items originally on the store are matched up, you can proceed to select and add new items from Quickbooks to be synced and start syncing inventory regularly.